
Hoodies are made through a predictable cut-and-sew workflow: design and tech pack, fabric selection by GSM, patterning and grading, sampling, cutting, sewing and assembly, decoration, then finishing and quality control. A full production cycle typically runs 2 to 6 weeks, with fabric choice and dye work usually driving the biggest swings in cost and timeline. Fabric family, whether that’s French terry or brushed fleece, quietly decides which machines, stitches, and finishing steps come next.
TL;DR:
- Fabric weight significantly impacts hoodie durability, fit, and warmth, with 320–380 GSM being the most common range for commercial models.
- Accurate tech packs with detailed specifications are essential to prevent costly rework and ensure the final product matches design expectations.
- Selection between cut-and-sew, blanks, and print-on-demand affects costs, lead times, and control over fit, fitting different business needs and scales.
- Proper sampling, including fit, wash, and quality tests, requires multiple rounds and careful review to avoid major defects in bulk production.
- Efficient marker layout and fabric relaxation are key factors that influence sewing quality, waste reduction, and overall manufacturing costs.
Table of Contents
- Cut-and-Sew vs. Blanks vs. Print-on-Demand: Choosing Your Production Route
- Fabric and Trims: What GSM Actually Tells You
- Writing a Tech Pack That Actually Prevents Mistakes
- What Happens During Sample Rounds
- Cutting the Fabric: Markers, Spreading, and Precision
- Inside the Sewing Room: Machines, Stitches, and Reinforcements
- Printing, Embroidery, and How Finishing Ties It Together
- Quality Control and Packing Standards Worth Requiring
- Timeline and Costs: What to Actually Expect
- How ThePreciousLamb Approaches the Trade-Offs
- Get the Look, Fabric, and Fit Right From the Start
- Where Most First-Time Brands Get This Wrong
- Sources
Cut-and-Sew vs. Blanks vs. Print-on-Demand: Choosing Your Production Route
The route you pick determines your cost floor, your lead time, and how much control you have over fit. There are three practical paths.
- Cut-and-sew: Fabric is sourced and cut to your own pattern, built from scratch. Full control over fit, fabric weight, and trims, but higher minimums and longer lead times.
- Blanks: You buy pre-made hoodies from a stock manufacturer and decorate them yourself or through a print shop. Fast, low minimums, but you’re locked into whatever fit and fabric the blank supplier offers.
- Print-on-demand (POD): No inventory at all. Orders trigger one-off production. Great for testing designs, weak for margin and fabric quality.
A tech pack is what separates a smooth cut-and-sew run from a frustrating one. It’s the technical document that tells the factory exactly what you want, down to seam allowances, so nobody is guessing. Skip it and you’ll pay for that ambiguity in rework, missed deadlines, or a hoodie that doesn’t match your sketch. Timelines shift based on whether you’re using stock fabric versus custom dye lots, and whether your trims are off-the-shelf zippers and cords or custom hardware that needs its own sourcing lead time.
Fabric and Trims: What GSM Actually Tells You
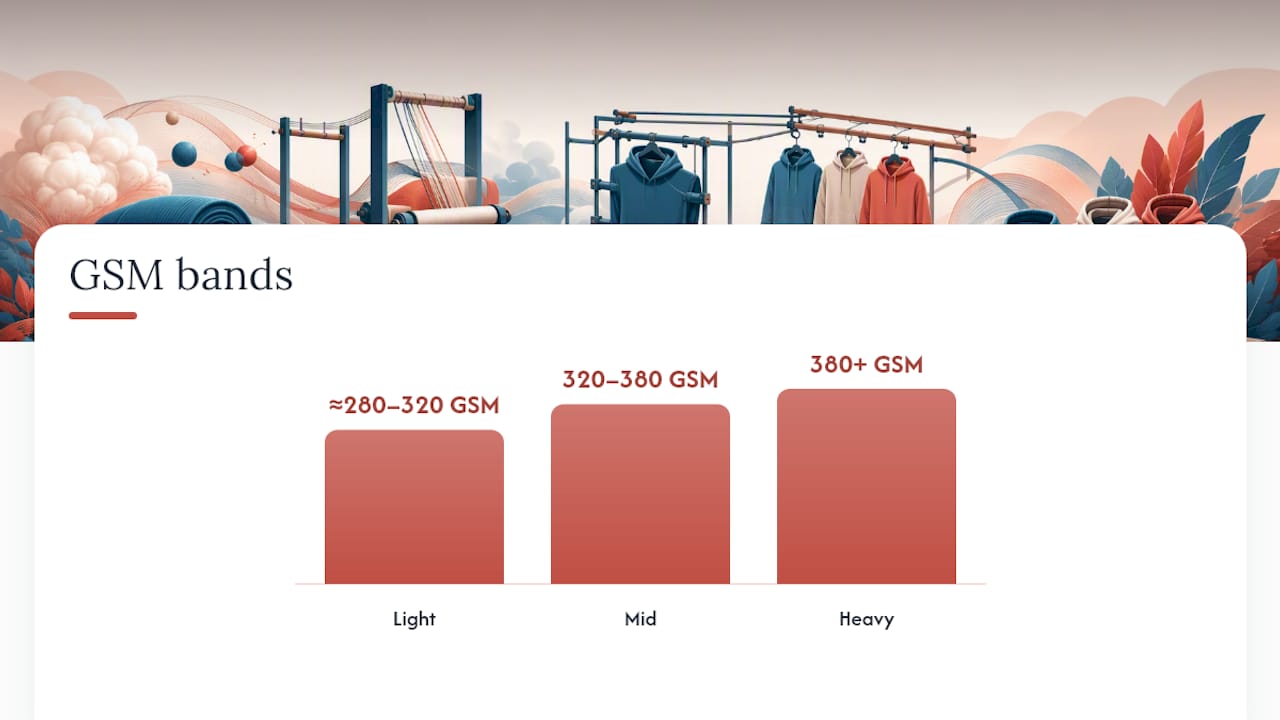
GSM, grams per square meter, is the single most useful number on a hoodie spec sheet because it predicts weight, warmth, and drape before you ever touch the fabric. Industry guidance breaks it into three practical bands:
- Light (≈280 to 320 GSM): Good for warm-climate hoodies or layering pieces. Feels closer to a heavy tee than a true sweatshirt.
- Mid (320 to 380 GSM): The commercial sweet spot most brands land on. Enough weight to feel substantial without becoming stiff or overly warm.
- Heavy (380+ GSM): Streetwear-grade weight. Structured, boxy silhouettes lean on this range to hold their shape.
Pro Tip: If you’re unsure where to start, request swatches at 340 GSM and 400 GSM side by side. The difference in drape is obvious the moment you hold both, and it will settle most fit debates faster than any spec sheet argument.
Fiber content changes how that weight behaves over time. Recycled fiber blends have closed much of that performance gap in recent years, though shrinkage behavior still varies by mill.
Brushed fleece and French terry are the two dominant sweatshirt fabric families. French terry keeps its looped back exposed, giving a lighter, more breathable feel. Brushed fleece runs that looped back through a mechanical brushing process that raises the fiber into a soft pile, which is what gives fleece its warmth and that “peached” hand-feel. Insist on shrinkage percentage, colorfastness results, and a physical handle sample before committing to a fabric lot. For ribbing, drawcords, eyelets, and aglets, standard components keep costs low. Custom hardware works fine; just budget extra lead time for it. You can see how these weight bands translate into finished garments in our GSM cheat sheet.
Writing a Tech Pack That Actually Prevents Mistakes
A tech pack is the blueprint the factory builds from, and it needs to leave nothing to interpretation. At minimum, it should include:
- Flat sketches (front, back, and any special details like a kangaroo pocket or split hood)
- A spec sheet with measurements at every size in your range
- A bill of materials (BOM) listing every fabric, trim, and thread
- Stitch types called out by seam
- Placement tolerances for prints, embroidery, or patches
Pattern making starts with a sample size, usually a middle size like a medium, cut as a physical master pattern. Grading then scales that master up and down across your size range while preserving proportions, so a stretched sleeve doesn’t suddenly look wrong on an XL.
Hood construction is one of the most overlooked cost levers. A simple two-panel hood is cheaper and faster to sew than a three-panel hood with a separate lining, but the three-panel version sits better around the neck and holds its shape longer. Silhouette matters too: oversized, drop-shoulder designs consume more fabric per unit than a standard fit cut from the same GSM fabric, because the marker (the layout pattern used to cut fabric) can’t nest the panels as efficiently.
Pro Tip: *Ask your factory for a marker efficiency percentage upfront.
What Happens During Sample Rounds
Sampling exists to catch expensive mistakes before they multiply across hundreds of units. Sampling confirms fit, fabric, and logo placement before a factory commits to bulk cutting, and skipping this stage is one of the costliest shortcuts a new brand can make.
- Fit sample: The first physical hoodie built from your pattern, used to check overall proportions and hood shape.
- Revised fit sample: A second pass after you send corrections, common because first samples rarely nail everything.
- Pre-production sample (PPS): The final sign-off sample, built from the actual bulk fabric and trims, not substitutes.
- Wash-test sample: A washed and dried unit used to check for shrinkage and colorfastness before the full run ships.
Each round typically takes one to two weeks and carries its own small sample fee, so plan two to three rounds into your timeline rather than assuming one will do. When reviewing a sample, check measurements against your spec sheet, wear and wash it, confirm print or embroidery sits exactly where you specified, and flex the seams to see how they behave under stress. Our sizing guide walks through the exact measurement points worth double-checking at this stage.
Cutting the Fabric: Markers, Spreading, and Precision
Before a single piece is cut, the factory builds a marker, the layout that arranges every pattern piece across the fabric width to minimize waste. A well-nested marker for a standard-fit hoodie can save real money across a large run, since fabric is usually the single biggest line item in the cost sheet.
- Spreading: Fabric is layered in stacks (plies) before cutting. Manual spreading works for small runs; automated spreading rollers handle large volumes faster and more consistently.
- Cutting method: Band knives and straight-blade cutters remain common for mid-size runs. Automated and laser cutting deliver tighter precision on complex curves like hood panels, but come with higher equipment costs that only pay off at volume.
- Fabric relaxation: Knitted fleece holds internal tension from how it’s rolled and stored. Letting it rest flat on the cutting table for 24 to 48 hours before cutting prevents the fabric from shifting or distorting after it’s sewn.
Skip the relaxation step and you’ll often see it later as twisted seams or a hoodie that hangs slightly off-grain after its first wash, a defect that’s nearly impossible to fix after the fact.
Inside the Sewing Room: Machines, Stitches, and Reinforcements
Assembly follows a logical order that minimizes handling and keeps pieces aligned. A typical sequence runs: pocket prep and attachment, front and back panel joins, shoulder seams, sleeve setting, hood assembly and attachment, side seams, then cuffs, hem, and waistband ribbing applied last.
Different machines handle different jobs:
- Overlock/serger: Finishes raw seam edges and prevents fraying, used on most interior seams.
- Coverstitch: Creates that flat, parallel double or triple row of stitching you see on hems and cuffs, both functional and decorative.
- Chainstitch: Fast and flexible, often used for hemming where some stretch recovery matters.
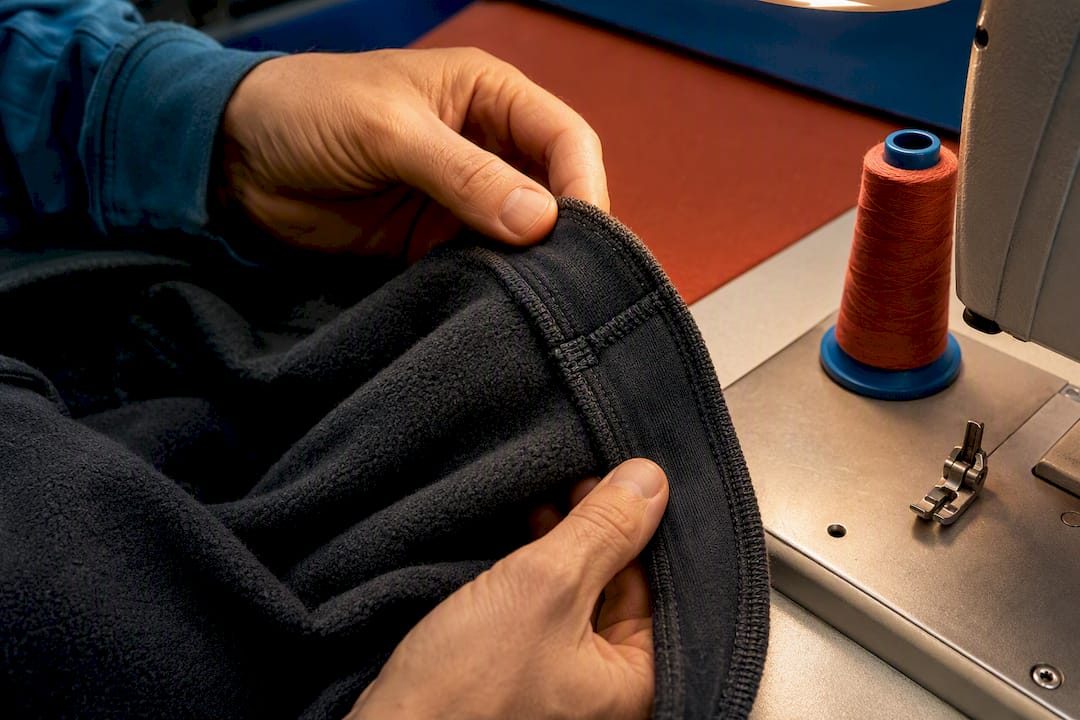
Durability comes down to a handful of construction choices that separate a hoodie that survives years of washing from one that unravels at the seams within months. Double-needle seams, bar-tacking at stress points like pocket corners, and polyester-blend thread all extend garment life meaningfully. Neck tape stabilizes the back neckline against stretching, and shoulder stays, or sandwiching clear elastic or twill tape into the shoulder seam allowance, stop heavy fleece from sagging under its own weight over time.
Pro Tip: Heavier GSM fabric needs a larger needle size, looser thread tension, and slower line speed than lightweight knits. A factory running 400 GSM fleece at the same settings as a 180 GSM tee will end up with skipped stitches and puckered seams.
The architecture of a well-built seam matters more in heavy fleece than in almost any other garment category, simply because the fabric’s weight puts constant stress on every join.
Printing, Embroidery, and How Finishing Ties It Together
Decoration choice depends heavily on the fabric surface and the look you’re after.
- Screen printing: Cost-effective at volume, crisp on smooth surfaces, less ideal on heavily brushed fleece where texture can soften fine detail.
- DTF/DTG: Good for small runs and complex, multicolor art with no setup minimums.
- Discharge printing: Removes dye from the fabric itself for a soft, vintage look, best on 100% cotton.
- Embroidery: Durable and premium-feeling, though it adds cost and doesn’t suit very thin fleece without a stabilizer backing.
- Puff print: Raised, textured print effect that reads well on heavyweight hoodies.
Sequencing matters. Most decoration happens after sewing but before washing, though all-over prints have to be applied to flat fabric before cutting and sewing, since there’s no way to print evenly across finished seams. Finishing treatments after decoration typically include a soft-hand or enzyme wash to relax the fabric and boost comfort, mechanical brushing to build the fleece pile, and steam pressing before folding. Trim attachment (drawcords, tags, care labels) and final poly-bagging happen last.
Quality Control and Packing Standards Worth Requiring
Inline QC checks garments during production, catching stitching or measurement errors before they compound across the whole run. Final inspection happens after the run is complete, checking a sample against your full spec sheet and lab standards. Standard lab tests to require include shrinkage percentage after a pre-wash cycle, colorfastness under rubbing and washing, and seam pull strength to confirm stitching holds under stress.
- Fold guides matching your brand’s retail presentation
- Polybag specifications, including thickness and any suffocation warning requirements
- Carton labeling with style number, size breakdown, and quantity
- Retained samples from each production lot for future reference
Timeline and Costs: What to Actually Expect
A custom cut-and-sew hoodie typically takes 2 to 6 weeks from approved tech pack to finished bulk goods, with sampling eating roughly a third of that window. Stock blanks can ship in days; custom cut-and-sew usually requires MOQs in the hundreds of units per style and color.
- Fabric and dye: The largest single cost driver, especially with custom colors that require their own dye lot.
- Trims: Standard zippers and cords keep costs down; custom hardware adds sourcing time.
- Marker efficiency: A tighter nesting layout lowers fabric waste and per-unit cost without touching your design.
- Decoration complexity: Multi-color embroidery or oversized puff prints add both cost and time.
Custom dye and bespoke trims are consistently the two levers most likely to push a project past six weeks.
How ThePreciousLamb Approaches the Trade-Offs
Every hoodie we bring to production starts with the same question: does this fabric weight and finish match how someone will actually wear it? A heavier GSM fleece with a brushed interior costs more to produce, but it holds shape and warmth far longer than a lighter alternative, which matters more to us than shaving a few dollars off a unit cost. Ribbing and finish choices aren’t cosmetic decisions. They dictate how a garment needs to be washed and cared for years down the line, which is why we point customers toward our hoodie care guide the moment they buy something in brushed fleece.
Get the Look, Fabric, and Fit Right From the Start
If you’re shopping for the finished result rather than building your own production line, the same GSM and fabric logic still applies. Fleece weight and finish decide how a hoodie feels a year from now, not just on day one. The Snow Washed Distressed Panel Pocket Hoodie uses the kind of brushed fleece construction covered above, built with the durability techniques, bar-tacking, reinforced seams, that separate a hoodie built to last from one that won’t survive a season of regular wear. Check it out on ThePreciousLamb if you want a hoodie made with the same standards this guide just walked through.
Where Most First-Time Brands Get This Wrong
Most guides to hoodie production spend all their energy on fabric and almost none on marker efficiency, and that’s backwards. Fabric choice sets your quality ceiling, but marker efficiency and silhouette decisions set your actual margin, quietly, on every single unit you produce. A drop-shoulder design isn’t just a style call. It’s a cost decision that compounds across your entire run.
The conventional advice to “just find a good factory” also undersells how much the tech pack does the real work. A mediocre factory with a precise tech pack outperforms a great factory guessing at your intent. If you’re starting out, spend your first real effort on the spec sheet and your fabric tests, not on chasing the lowest quote you can find. Shrinkage and colorfastness data cost you almost nothing to request and save you from the single most common bulk-order disaster: a run that looks perfect on the rack and falls apart after the first wash.
Prioritize the tech pack, then the fabric tests, then everything else follows more smoothly than most new brands expect.
— Joshua
Sources
For deeper specs on fabric weights and mill-level sourcing, consult the Custom Hoodie Manufacturing Guide, the White Cotton sweatshirt production guide, and the OEM factory walkthrough. Always confirm exact shrinkage and colorfastness numbers directly with your fabric mill or lab test provider rather than relying on general guidance alone.
- Custom Hoodie Manufacturing Guide 2026 for Fashion Brands
- Sweatshirt Production: Fabrics, Construction & What to Ask Your Factory | White Cotton
- Hoodie Manufacturing Process Explained | OEM Factory