
To read a size chart correctly, measure yourself first, confirm whether the numbers describe your body or the finished garment, then match your largest controlling measurement and adjust for ease. A tape measure and two minutes are more reliable than trusting your usual size. Check the units listed and any fit notes before you buy, then run through the checklist below to confirm you got it right.
TL;DR:
- Always confirm whether a size chart shows body measurements or garment measurements to avoid sizing errors.
- Measure yourself twice with a level, soft tape at the same time of day you plan to wear the garment for the most accurate fit.
- Match your largest controlling measurement to the correct chart column, and size up if you are between two sizes, especially with low-stretch fabrics.
- Use fit notes, model stats, and fabric details to adjust sizing choices based on garment cut, stretch, and drape.
- Save your measurements in both units to streamline future purchases and prevent common mistakes from relying on memory.
Table of Contents
- How to Measure Your Body: Exact Points and Repeatable Technique
- [How to Measure a Garment You Already Own and Use It as a Reference (see details on key vertical and horizontal garment measurements)](#how-to-measure-a-garment-you-already-own-and-use-it-as-a-reference-see-details-on-key-vertical-and-horizontal-garment-measurementshttpsbeautifulwindowselgincomblogskey-vertical-and-horizontal-garment-measurements)
- How to Identify Chart Type and Units Before You Trust the Numbers
- How to Match Your Measurements to a Size
- How to Read Fit Notes, Model Stats, and Fabric Details
- Quick Pre-Purchase Checklist Before You Hit Buy
- Practical Tips and Proof: Joshua and Thepreciouslamb’s Measuring and Fit Guidance
- Body Measurements vs. Garment Measurements: What Actually Separates Them
- Why We Rebuilt Our Sizing Pages Around This Exact Method
- Put This Guide to Work on Your Next Order
- Sources
How to Measure Your Body: Exact Points and Repeatable Technique
You need three things before you start: a flexible sewing tape (not a metal one), thin form-fitting clothing or underwear, and ideally a second person to help. Measuring alone over a hoodie gives you numbers that look precise but mean nothing. A soft tape measure kept level around the body, without cinching it tight, is the difference between a chart that works and one that sends your order back in a box.
Here’s where the tape actually goes:
- Bust or chest: Wrap the tape around the fullest part of your chest, keeping it parallel to the floor and snug but not compressed.
- Underbust: Measure directly beneath the chest, useful for structured tops and fitted jackets.
- Natural waist: Bend slightly to one side and find the crease that forms. That’s your natural waist, usually 1 to 2 inches above your belly button, not wherever your jeans happen to sit.
- Hips: Measure around the widest point, typically 7 to 9 inches below your natural waist.
- Inseam: Measure from the top of your inner thigh down to your ankle bone, along a pair of pants that already fits the length you want.
- Shoulder width: Measure from the edge of one shoulder bone to the other, across your back.
Write every number down in both inches and centimeters. Measure each spot twice. If the two readings differ by more than a quarter inch, something shifted, and you should measure again.
The most common error is measuring over a sweater or with the tape twisted, which adds bulk you don’t actually have. The second most common error is pulling the tape too tight, which shaves half an inch off a number that then makes you order a size too small. A soft tape measure works best when it sits level and loose enough to slide a finger underneath.
Pro Tip: Measure at the same time of day you plan to wear the garment. Waist measurements can shift by half an inch depending on when you last ate, and that’s enough to bump you into a different row on some charts.
If you’re measuring for a fitted shirt, the chest measurement guide walks through the exact tape placement that matters most for button-ups.
How to Measure a Garment You Already Own and Use It as a Reference (see details on key vertical and horizontal garment measurements)
Body measurements tell you your actual size. Garment measurements tell you how a specific piece of clothing is built, and that’s often the more useful number when you already own something that fits the way you want.
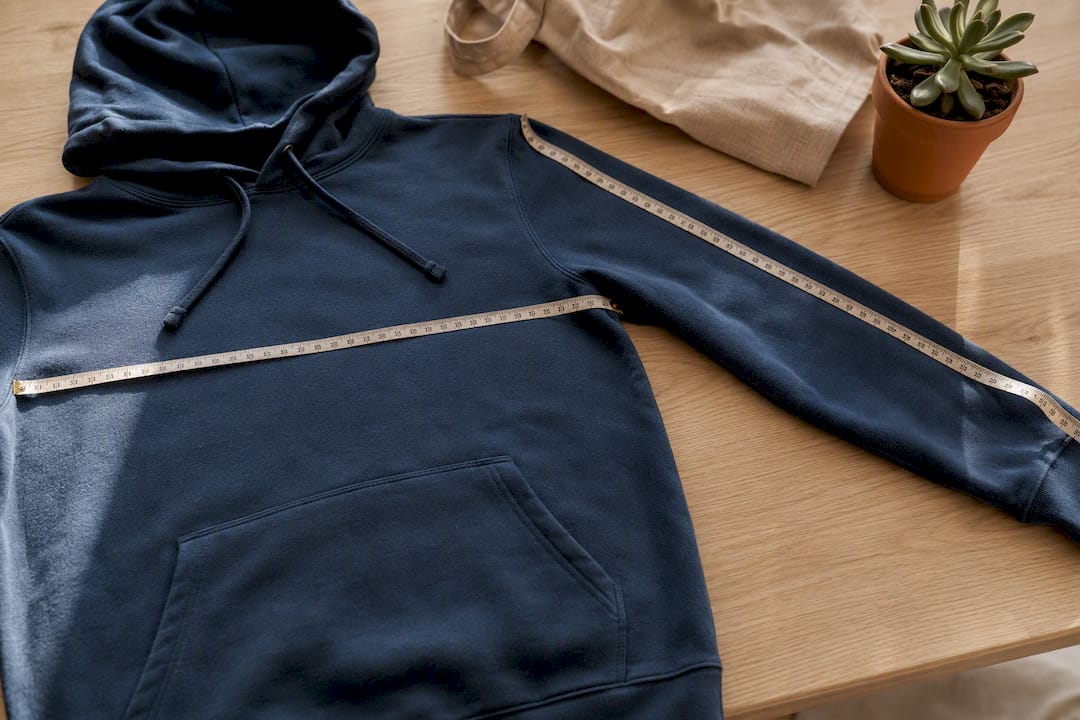
- Lay the garment flat on a table, buttoned or zipped, with no wrinkles pulling the fabric.
- Measure pit-to-pit across the chest, from one armpit seam to the other, then double it to get the full chest circumference.
- Measure the waist the same way, flat across the narrowest point, then double that number too.
- Measure length from the top of the shoulder seam straight down to the hem.
- Measure the inseam along the inner leg seam from crotch to hem, for pants or shorts.
Doubling a flat measurement is the step people skip, and it’s the reason garment charts and body charts look so different for what seems like the same size. A shirt that measures 21 inches pit-to-pit flat is actually 42 inches around, which is standard practice confirmed by pattern-drafting guides that use the same flat-and-double method for sizing.
This technique matters most when you’re chasing a specific silhouette rather than a technically correct fit. If you own a hoodie that drapes exactly how you like, measuring it flat and comparing those numbers to a new product’s garment chart gets you closer to that same drape than your bust measurement ever will. Body measurements answer “what size am I.” A garment you already love answers “what fit do I actually want.”
How to Identify Chart Type and Units Before You Trust the Numbers
Not every size chart tells you what its numbers actually represent, and that’s the single biggest source of online returns. A chart is either showing body measurements (numbers that describe the wearer) or garment measurements (numbers that describe the physical item), and the two can differ by several inches on the exact same size label.
Look for these clues first:
- A flat sketch icon next to the measurement diagram usually signals garment measurements, taken the way you’d measure the item laid on a table.
- A figure with a tape wrapped around the body signals body measurements, meaning the chart expects your actual dimensions, not the shirt’s.
- A note near the header like “garment measurements” or “to fit bust” spells it out directly, when brands bother to include it.
- No label at all means you should assume body measurements unless the numbers seem unusually large for a size small, which usually means garment measurements with built-in ease.
Ease is the room a garment adds beyond your actual body size, and it’s why you can’t compare a garment-measurement number straight to your bust size without adjusting. A size chart that lists garment measurements without stating the basis is incomplete by any reasonable standard, and treating it as a body chart is how a “medium” ends up two sizes too big.
Units cause a second, quieter kind of error. A chart mixing centimeters and inches without clear labels invites you to compare the wrong column, and a soft tape measure kept level with matching units is the only way to avoid a conversion mistake that throws your whole size off by a full number.
How to Match Your Measurements to a Size
Once you know your numbers and the chart’s basis, matching them is mostly mechanical. Work left to right: find your measurement in the correct column, then read across to the size label at the end of that row. Skip this step and default to your usual size, and you’re back to guessing.
Different garment categories weight measurements differently:
- Tops and shirts: Chest or bust controls the fit; length matters second.
- Bottoms: Waist decides the row, hip confirms it, inseam sets the length.
- Dresses: Bust and hip both matter, since a dress has to clear both without the wrong measurement forcing a size up.
- Outerwear and structured jackets: Shoulder width and sleeve length often override chest, because a jacket that’s too tight across the shoulders can’t be fixed the way a loose chest can be cinched with a belt.
If your numbers land you between two sizes, the rule of thumb that holds up across most brands is to size to your largest controlling measurement and alter the rest. A waistband is easy for a tailor to take in. A chest that’s too tight is not. For low-stretch fabrics like raw denim or heavyweight cotton, size up when in doubt, since there’s no elastane to give you room later. For high-stretch knits, sizing down one step usually still fits comfortably.
Pro Tip: Convert once, then stop switching between units. Toggling back and forth between inches and centimeters mid-comparison is how a 38 inch chest quietly becomes a “37.5,” and that rounding error is enough to push you into the wrong row.
A denim jacket is the clearest example of shoulder and sleeve length overriding chest fit, since the structured shoulder seam on a jacket like this doesn’t stretch or adjust the way a t-shirt hem does.
How to Read Fit Notes, Model Stats, and Fabric Details
The measurement chart gets you most of the way there. Fit notes and model stats close the gap the numbers can’t cover, because a chart can’t show you drape, stretch, or how a garment actually hangs on a body shaped differently from the size chart’s assumptions.
“Runs small” or “runs large” on a product page is the brand telling you their own chart underdelivers or overdelivers compared to standard sizing; take it seriously and size accordingly rather than trusting the chart alone. “Relaxed fit” or “oversized” means the garment was designed with extra ease built in beyond what a slim or regular cut would carry, so don’t assume your usual size translates the same way across those fit categories.
Stretch content changes the math too. A garment listing 3 to 5% elastane usually lets you take your true size or size down one comfortably. A garment with no stretch and no recovery, like rigid denim or a heavyweight canvas jacket, behaves differently, and sizing up tends to be the safer call for comfort.
Model stats matter more than shoppers give them credit for. If a model listed at 6 feet 1 inch is wearing a size medium, and you’re 5 feet 5 inches, that same medium is going to hang longer on you proportionally, even if your chest measurement matches theirs exactly. Fit notes and model information exist precisely because charts can’t capture drape or proportion the way a number on a grid implies they can.
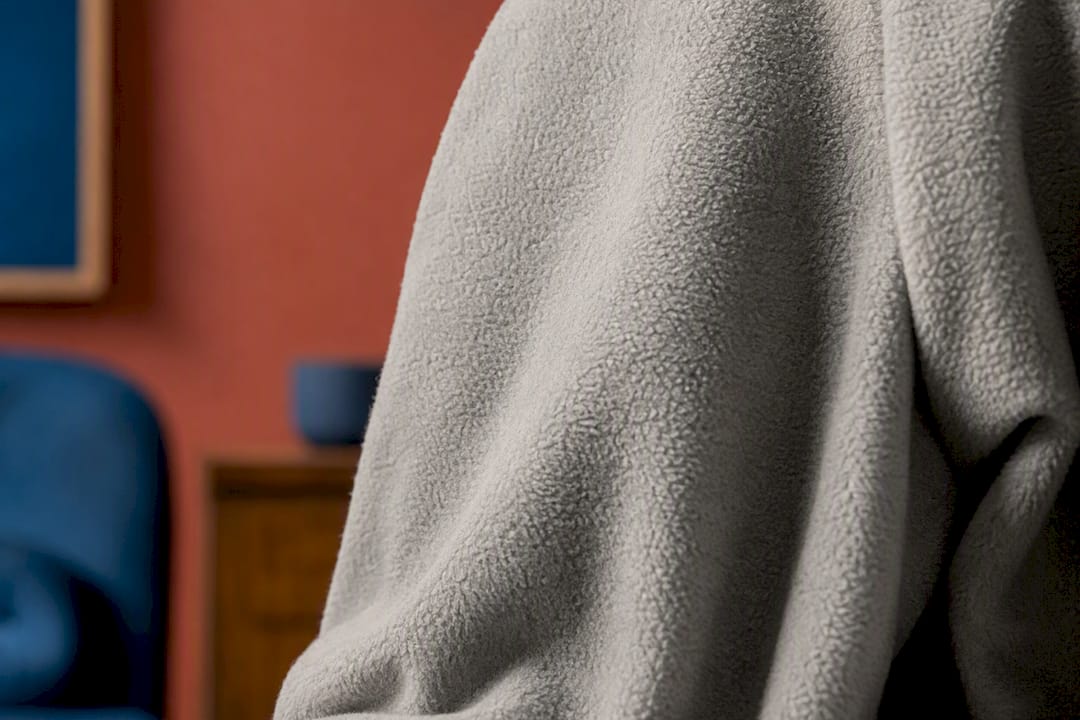
Fabric weight also plays into how a garment sits, and the GSM cheat sheet breaks down why a heavier knit drapes closer to the body while a lighter one billows more at the same size.
Quick Pre-Purchase Checklist Before You Hit Buy
Run through this before you click purchase, not after the package arrives:
- Confirm whether the chart shows body or garment measurements.
- Confirm your own largest controlling measurement for that garment type.
- Read the fit notes for “runs small,” “relaxed,” or stretch percentage.
- Check the model’s height and size against your own proportions.
- Compare the numbers to a similar garment you already own and like.
- Save your measurements in both inches and centimeters for next time.
| Check | What to look for | Why it matters |
|---|---|---|
| Chart basis | Body vs. garment measurements labeled or implied | Prevents comparing the wrong kind of number |
| Units | Inches and centimeters both listed | Stops rounding and conversion mistakes |
| Fit notes | “Runs small,” “relaxed,” stretch percentage | Adjusts the raw chart number to real-world fit |
| Model stats | Height and size worn | Flags likely length or proportion mismatches |
Saving your own numbers once means you never have to pull the tape measure out again for a routine reorder, and it’s the single habit that makes every future purchase faster.
Practical Tips and Proof: Joshua and Thepreciouslamb’s Measuring and Fit Guidance
Joshua has written several of Thepreciouslamb’s measurement guides, including a chest-measurement walkthrough built around the exact tape placement shoppers get wrong most often, and a breakdown of hoodie sizing that accounts for the extra ease built into a relaxed cut.
A few rules from those guides show up across Thepreciouslamb’s own product pages: hoodies and fleece pieces get sized with intentional room in the shoulders, so a true-to-size chest measurement still leaves space for layering. Denim, by contrast, gets no such cushion. Rigid denim jackets and jeans carry almost no stretch, so the brand’s own advice is to size up rather than fight a waistband that won’t give.
- Chest measurements drive Thepreciouslamb’s top and hoodie sizing.
- Denim pieces assume little to no stretch, so sizing up is the standard recommendation.
[author_bio] [brand_signal]
Body Measurements vs. Garment Measurements: What Actually Separates Them
Body measurements describe you. Garment measurements describe the item. That distinction sounds simple until you’re staring at a chart with a column labeled “38” and no way to tell which one it means.
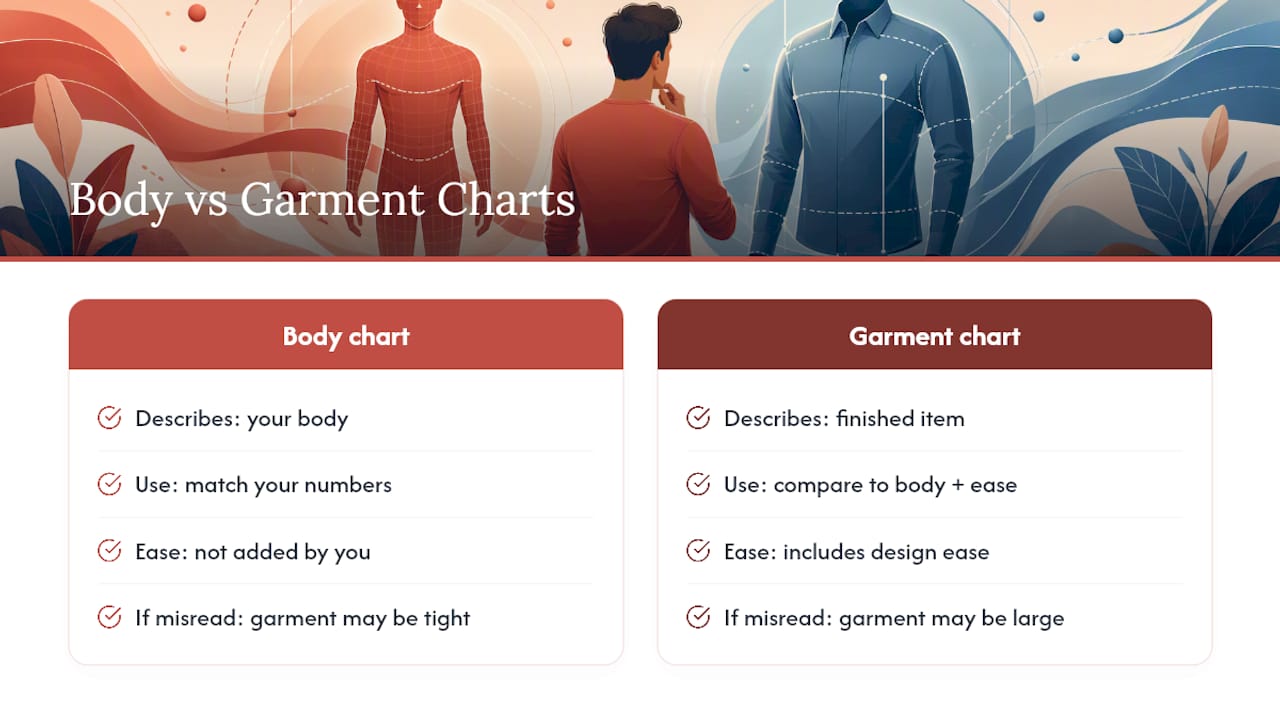
A body measurement chart assumes you’ll take your own bust, waist, or hip number and match it directly to the row that fits. The brand has already built ease into the garment on their end, so you never add anything yourself. A garment measurement chart works differently: those numbers come from measuring the actual finished product flat on a table, which means they already include whatever room the design intends, and you’re comparing them to your body plus the amount of ease you personally want.
The mistake happens when someone treats a garment chart like a body chart, or vice versa. A “40 inch chest” on a garment chart might correspond to someone with a 36 inch actual chest, once you subtract the 4 inches of ease built into a relaxed cut. Read that same 40 as a body measurement, and you’d size down and end up with something painfully tight. Ease is the variable that makes garment charts run larger than body charts for the same nominal size, and it’s the reason two brands’ size mediums almost never match.
Once you know which type of chart you’re reading, everything else in this guide becomes a matter of matching numbers correctly rather than guessing.
Why We Rebuilt Our Sizing Pages Around This Exact Method
Most returns Thepreciouslamb sees trace back to one habit: shoppers order their usual size instead of checking the actual chart. A medium from one brand rarely matches a medium from another, and relying on memory instead of a tape measure is the single most preventable cause of a bad fit.
That’s why every product page carries a chart labeled with its actual basis, dual units, and fit notes specific to that piece, rather than one generic chart reused across the entire catalog. It’s a small change, but it’s the one that matters most once you understand how easily a garment chart and a body chart get confused.
If you haven’t measured yourself in a while, do it before your next order. Check Thepreciouslamb’s size guide resources against your own numbers rather than trusting the label from your last purchase.
— Joshua
Put This Guide to Work on Your Next Order
Thepreciouslamb builds every product chart around the same standard this guide just walked through: labeled units, a clear basis, and fit notes that tell you exactly how a piece is meant to sit, so you’re never left guessing between a body number and a garment number the way you would on a chart with no context. That’s the concrete advantage over shopping a site that reuses one generic chart across its whole catalog. You get the specific numbers for the specific item.

Two products make good practice runs for everything above. The Snow Washed Distressed Panel Pocket Hoodie carries the relaxed-fit ease typical of Thepreciouslamb’s hoodie line, so measure your chest, check the model’s height against yours, and compare against a hoodie you already own before choosing a size. The Denim Vintage Washed Heavyweight Jacket is rigid denim with almost no stretch, which means shoulder and sleeve length matter as much as chest, and sizing up is usually the right call if you land between two sizes.
Pull up either product page, check the model stats and size chart against the measurements you just took, and order with the numbers instead of a guess.
Sources
The distinction between body and garment measurements, along with the role of ease, comes from SizeChart.shop’s breakdown of the two chart types. Matching units and using a level, soft tape measure is covered in Ergonode’s guide to size chart mistakes. The case for measuring your actual body instead of relying on your usual size comes from Tellar’s sizing guide. What a complete, well-built chart should include, units, basis, fit intent, and measurement points, is laid out in Robosize’s fit chart guide, with dual-unit and placement best practices confirmed by Points of Measure.